Customising the layout of your Facebook page is a quick and easy task that makes it easier for your customers to find the information they’re looking for. It is also helpful for you as a business to be able to direct your audience to the parts of your page that you want them to see the most. This article will show you how simple it is to reorder the menu on your Facebook page.
Why bother customising your page?
The layout of a Facebook page is not highly customisable, however, the few changes that you can make can be helpful for directing your audience to certain information and hiding what does not serve your purpose.
When deciding what menu items to have on your page you should consider what your audience will be most interested in seeing and bring that to the forefront.
If you have hundreds of excellent reviews you might like to show them off. Perhaps you run an online store and have products set up in your Facebook shop. In that case, you’re definitely going to want to have your shop as one of the top menu items. Are you a photographer? Show off your work by giving your photos priority in the menu.
Using templates
Facebook has created templates for different business types with recommended layouts designed to serve different organisations and their audiences. Templates are there for a variety of pages, including different business types (e.g. restaurants and shops) and other non-business options (e.g. politicians and public figures).
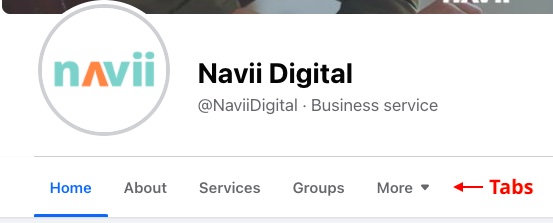
These templates include the type of page your business is listed as (e.g. below you can see Navii is listed as a business service), and a primary button (e.g. ‘get directions’ or ‘get started’), and a certain order for your menu (referred to as ‘tabs’). The templates are there to help you but are also customisable, so if you like most of a template you can still change the order of your menu and your primary button if you wish.
How to reorder the menu on your Facebook page
For this exercise, we will be customising the order of your ‘tabs’ (aka the menu items) on your Facebook page.

Follow these steps to re-order the tabs on your page.

- Go to your Facebook page.
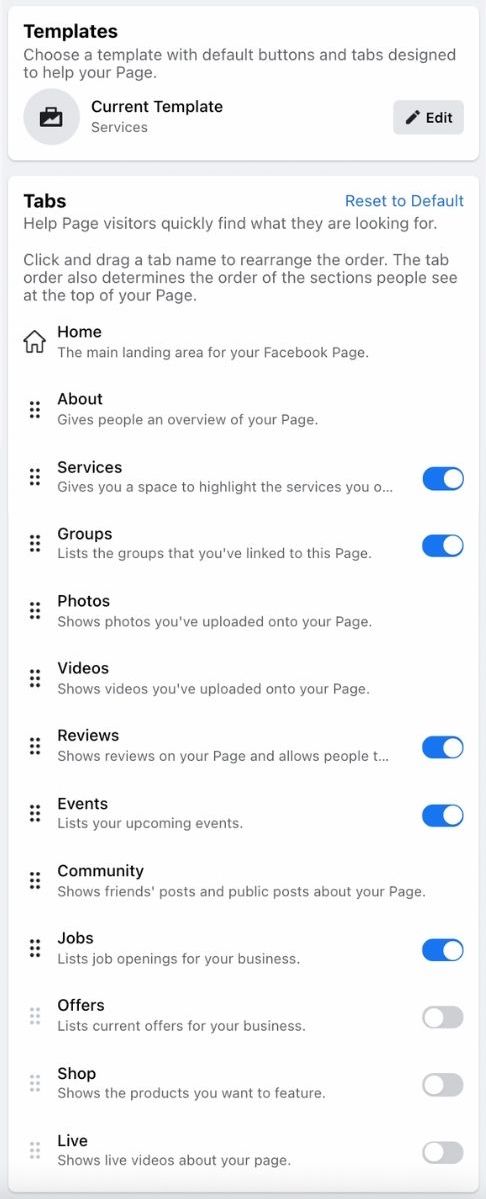
- In the page settings in the left-hand menu select ‘Tabs and Templates’.
- Browse through these templates to see if any of the suggested formats would work for your business. Note that you can still make tweaks to whichever one you choose.
- Use the toggles on the right of the tabs to turn them on or off according to your preference. Note that the About, Photos, Videos and Community tabs will always appear by default.
- Use the handles (the 6 dark dots on the left) to maneuver each of the tabs up or down until you have them in the order you want.
- Navigate back to your business page to make sure that the order has been updated. Facebook’s business page settings update automatically when changed and do not have a manual ‘save’ button.


